HuggingFace Diffusers 0.3 : 概要 (翻訳/解説)
翻訳 : (株)クラスキャット セールスインフォメーション
作成日時 : 09/26/2022 (v0.3.0)
* 本ページは、HuggingFace Diffusers の以下のドキュメントを翻訳した上で適宜、補足説明したものです:
* サンプルコードの動作確認はしておりますが、必要な場合には適宜、追加改変しています。
* ご自由にリンクを張って頂いてかまいませんが、sales-info@classcat.com までご一報いただけると嬉しいです。

- 人工知能研究開発支援
- 人工知能研修サービス(経営者層向けオンサイト研修)
- テクニカルコンサルティングサービス
- 実証実験(プロトタイプ構築)
- アプリケーションへの実装
- 人工知能研修サービス
- PoC(概念実証)を失敗させないための支援
- お住まいの地域に関係なく Web ブラウザからご参加頂けます。事前登録 が必要ですのでご注意ください。
◆ お問合せ : 本件に関するお問い合わせ先は下記までお願いいたします。
- 株式会社クラスキャット セールス・マーケティング本部 セールス・インフォメーション
- sales-info@classcat.com ; Web: www.classcat.com ; ClassCatJP
HuggingFace Diffusers 0.3 : 概要

より正確には、
- 最先端の拡散パイプライン、これは数行のコードだけで推論を実行できます (src/diffusers/pipeline 参照)。この概要 を確認して総てのサポートされるパイプラインと対応する公式論文を見てください。
- 様々なノイズスケジューラ、これは推論において望ましいスピード vs. 品質のトレードオフのために交換可能に使用できます (src/diffusers/schedulers 参照)。
- UNet のような複数のタイプのモデルは end-to-end な拡散システムのビルディングブロックとして使用できます (src/diffusers/models 参照) 。
- 最もポピュラーな拡散モデル・タスクを訓練する方法を示す訓練サンプル (examples 参照, e.g. unconditional-image-generation)。
インストール
With pip :
pip install --upgrade diffusers
With conda :
conda install -c conda-forge diffusers
Apple Silicon (M1/M2) サポート :
ドキュメント を参照してください。
クイックスタート
始めるために、2 つのノートブックを見ることを勧めます :
- Getting started with Diffusers ノートブック、これは拡散モデル, スケジューラとパイプラインの使用方法の end-to-end なサンプルを紹介します。総て (モデル, スケジューラ, ノイズ処理) を処理するパイプライン抽象の使用方法を学習し、ライブラリの個々の独立したビルディングブロックを理解するためにもこのノートブックを見てください。
- Training a diffusers model ノートブックは拡散モデルの訓練方法をまとめています。このノートブックは画像データセットで拡散モデルを訓練するため、説明のためのグラフィクスとともに、step-by-step のアプローチを取ります。
新しい 🎨 🎨 🎨 Stable Diffusion は diffusers と完全互換になりました!
Stable Diffusion は CompVis, Stability AI と LAION の研究者と技術者により作成されたテキスト-to-画像の潜在拡散モデルです。それは LAION-5B データベースのサブセットの 512×512 画像で訓練されています。このモデルはモデルをテキスト・プロンプトで条件付けるために凍結された CLIP ViT-L/14 テキストエンコーダを使用しています。860M UNet と 123M テキストエンコーダを持つ、このモデルは比較的軽量で少なくとも 10GB VRAM を持つ GPU で動作します。詳細は モデルカード を見てください。
Stable Diffusion 重みをダウンロードまたは使用する前に、モデルライセンスを受け入れる必要があります。モデルカード にアクセスし、ライセンスを読んで、同意するならばチェックボックスをチェックしてください。貴方は
Stable Diffusion によるテキスト-to-画像生成
# make sure you're logged in with `huggingface-cli login`
from torch import autocast
from diffusers import StableDiffusionPipeline
pipe = StableDiffusionPipeline.from_pretrained("CompVis/stable-diffusion-v1-4", use_auth_token=True)
pipe = pipe.to("cuda")
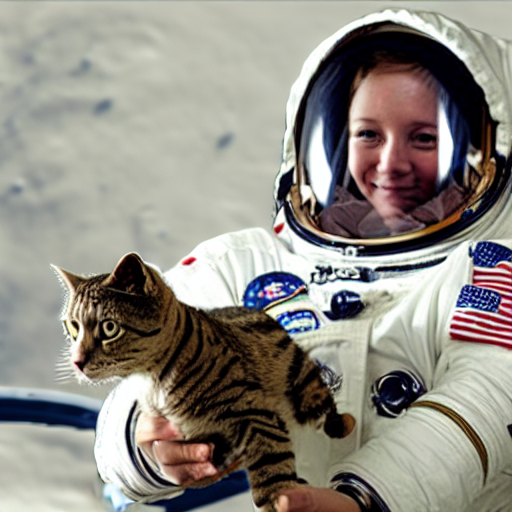
prompt = "a photo of an astronaut riding a horse on mars"
with autocast("cuda"):
image = pipe(prompt).images[0]
Note : トークンを使用することを望まない場合、(ライセンス承認後) 単純にモデル重みをダウンロードして、ローカルフォルダへのパスを StableDiffusionPipeline に渡すこともできます。
git lfs install
git clone https://huggingface.co/CompVis/stable-diffusion-v1-4
フォルダが ./stable-diffusion-v1-4 下のローカルにストアされていると仮定すると、認証トークンを必要とすることなく stable diffusion を実行することもできます :
pipe = StableDiffusionPipeline.from_pretrained("./stable-diffusion-v1-4")
pipe = pipe.to("cuda")

prompt = "a photo of an astronaut riding a horse on mars"
with autocast("cuda"):
    image = pipe(prompt).images[0]
GPU メモリで制限されている場合、モデルを fp16 で使用し、アテンション計算を切り分ける (= chunk) ことを考えたいかもしれません。以下のスニペットは 4GB VRAM 未満という結果になるはずです。
pipe = StableDiffusionPipeline.from_pretrained(
    "CompVis/stable-diffusion-v1-4",
    revision="fp16",
    torch_dtype=torch.float16,
    use_auth_token=True
)
pipe = pipe.to("cuda")

prompt = "a photo of an astronaut riding a horse on mars"
pipe.enable_attention_slicing()
with autocast("cuda"):
    image = pipe(prompt).images[0]
最後に、別のスケジューラを使用したい場合、それをパイプラインの前に単純にインスタンス化して from_pretrained に渡すことができます。
from diffusers import LMSDiscreteScheduler

lms = LMSDiscreteScheduler(
    beta_start=0.00085,
    beta_end=0.012,
    beta_schedule="scaled_linear"
)

pipe = StableDiffusionPipeline.from_pretrained(
    "CompVis/stable-diffusion-v1-4",
    revision="fp16",
    torch_dtype=torch.float16,
    scheduler=lms,
    use_auth_token=True
)
pipe = pipe.to("cuda")

prompt = "a photo of an astronaut riding a horse on mars"
with autocast("cuda"):
    image = pipe(prompt).images[0]

image.save("astronaut_rides_horse.png")
Stable Diffusion h画像-to-画像 text-guided 生成
StableDiffusionImg2ImgPipeline は新しい画像の生成を条件付けるためにテキストプロンプトと初期画像を渡すことができます。
from torch import autocast
import requests
import torch
from PIL import Image
from io import BytesIO

from diffusers import StableDiffusionImg2ImgPipeline

# load the pipeline
device = "cuda"
model_id_or_path = "CompVis/stable-diffusion-v1-4"
pipe = StableDiffusionImg2ImgPipeline.from_pretrained(
    model_id_or_path,
    revision="fp16",
    torch_dtype=torch.float16,
    use_auth_token=True
)
# or download via git clone https://huggingface.co/CompVis/stable-diffusion-v1-4
# and pass `model_id_or_path="./stable-diffusion-v1-4"` without having to use `use_auth_token=True`.
pipe = pipe.to(device)

# let's download an initial image
url = "https://raw.githubusercontent.com/CompVis/stable-diffusion/main/assets/stable-samples/img2img/sketch-mountains-input.jpg"

response = requests.get(url)
init_image = Image.open(BytesIO(response.content)).convert("RGB")
init_image = init_image.resize((768, 512))

prompt = "A fantasy landscape, trending on artstation"

with autocast("cuda"):
    images = pipe(prompt=prompt, init_image=init_image, strength=0.75, guidance_scale=7.5).images

images[0].save("fantasy_landscape.png")
このサンプルを colab で実行することもできます。
Stable Diffusion を使用したインペインティング (画像修復)
StableDiffusionInpaintPipeline はマスクとテキストプロンプトを提供することで画像の特定の部分を編集することができます。
from io import BytesIO

from torch import autocast
import torch
import requests
import PIL

from diffusers import StableDiffusionInpaintPipeline

def download_image(url):
    response = requests.get(url)
    return PIL.Image.open(BytesIO(response.content)).convert("RGB")

img_url = "https://raw.githubusercontent.com/CompVis/latent-diffusion/main/data/inpainting_examples/overture-creations-5sI6fQgYIuo.png"
mask_url = "https://raw.githubusercontent.com/CompVis/latent-diffusion/main/data/inpainting_examples/overture-creations-5sI6fQgYIuo_mask.png"

init_image = download_image(img_url).resize((512, 512))
mask_image = download_image(mask_url).resize((512, 512))

device = "cuda"
model_id_or_path = "CompVis/stable-diffusion-v1-4"
pipe = StableDiffusionInpaintPipeline.from_pretrained(
    model_id_or_path,
    revision="fp16",
    torch_dtype=torch.float16,
    use_auth_token=True
)
# or download via git clone https://huggingface.co/CompVis/stable-diffusion-v1-4
# and pass `model_id_or_path="./stable-diffusion-v1-4"` without having to use `use_auth_token=True`.
pipe = pipe.to(device)

prompt = "a cat sitting on a bench"
with autocast("cuda"):
    images = pipe(prompt=prompt, init_image=init_image, mask_image=mask_image, strength=0.75).images

images[0].save("cat_on_bench.png")
シードと潜在 (変数) を再利用してプロンプトを微調整する
結果を再生成するために独自の潜在変数を生成したり、好きな特定の結果のプロンプトを微調整することができます。このノートブック はそれを行なう方法をステップ毎に示します。Google Colab でそれを実行することもできます。
詳細は、Stable Diffusion ノートブック を確認して リリースノート を調べてください。
Examples
Diffusers の実行を試す多くの方法があります!ここでは (主として DiffusionPipelines と Google Colab を使用した) コードにフォーカスしたツールと対話的な web ツールの要点を述べます。
コードの実行
コードを貴方自身で実行したい場合 💻、以下を試すことができます :
# !pip install diffusers transformers
from torch import autocast
from diffusers import DiffusionPipeline

device = "cuda"
model_id = "CompVis/ldm-text2im-large-256"

# load model and scheduler
ldm = DiffusionPipeline.from_pretrained(model_id)
ldm = ldm.to(device)

# run pipeline in inference (sample random noise and denoise)
prompt = "A painting of a squirrel eating a burger"
with autocast(device):
    image = ldm([prompt], num_inference_steps=50, eta=0.3, guidance_scale=6).images[0]

# save image
image.save("squirrel.png")
# !pip install diffusers
from torch import autocast
from diffusers import DDPMPipeline, DDIMPipeline, PNDMPipeline

model_id = "google/ddpm-celebahq-256"
device = "cuda"

# load model and scheduler
ddpm = DDPMPipeline.from_pretrained(model_id)  # you can replace DDPMPipeline with DDIMPipeline or PNDMPipeline for faster inference
ddpm.to(device)

# run pipeline in inference (sample random noise and denoise)
with autocast("cuda"):
    image = ddpm().images[0]

# save image
image.save("ddpm_generated_image.png")
他のノートブック :
Web デモ
幾つかの web デモで遊びたいだけなら、以下の
- モデル : テキスト-to-画像 Latent Diffusion : Hugging Face Spaces
- モデル : 顔 generator : Hugging Face Spaces
- モデル : 様々なスケジューラによる DDPM : Hugging Face Spaces
- モデル : スケッチからの条件付き生成 : Hugging Face Spaces
- モデル : Composable diffusion : Hugging Face Spaces
定義
モデル : $p_\theta(\mathbf{x}_{t-1}|\mathbf{x}_t)$ (下図参照) をモデル化し、画像へのノイズのある入力をノイズ除去するために end-to-end に訓練されたニューラルネットワークです。
例: UNet, 条件付き UNet, 3D UNet, Transformer UNet

スケジューラ : 推論と訓練の両者のためのアルゴリズム・クラス。このクラスはアルファ、ベータスケジュールに従って前の画像を計算し、訓練のためにノイズを予測する機能を提供します。
例: DDPM, DDIM, PNDM, DEIS

拡散パイプライン : 複数の拡散モデル, 可能なテキストエンコーダ 等々を含む end-to-end なパイプライン。
Examples: Glide, Latent-Diffusion, Imagen, DALL-E 2

哲学
- 高度に最適化されたコードよりも可読性と明瞭性を選択します。読みやすく、直感的で初歩的なコード設計を提供することに強い重点が置かれます。例えば、提供される スケジューラ は、提供される モデル から分離されて、元の論文と並行して読むことができる良くコメントされたコードを提供します。
- Diffusers は モダリティ独立 で、ビジョンと音声のような 連続的な出力 を生成するシステムを構築する事前訓練済みモデルとツールを提供することにフォーカスしています。
- 拡散モデルとスケジューラは簡潔で、初歩的なビルディングブロックとして提供されます。対照的に、拡散パイプラインは end-to-end な拡散システムのコレクションで、そのまますぐに利用できて、オリジナル実装にできる限り近くあるべきで、そしてテキストエンコーダのような、他のライブラリのコンポーネントを含むことができます。拡散パイプラインのサンプルは Glide と Latent Diffusion です。
進行中
最初のリリースについては、
- Diffusers for 音声
- Diffusers for 強化学習 (initial work happening in #105).
- Diffusers for 動画生成
- Diffusers for 分子生成 (initial work happening in #54)
幾つかのパイプライン・コンポーネントには既に取り組んでいます、つまり :
- BDDMPipeline for spectrogram-to-sound ヴォコーディング
- GLIDEPipeline to support OpenAI の GLIDE モデル
- Grad-TTS for テキスト-to-音声生成 / 条件付き音声生成
diffusers が一般的な拡散モデルのために有用なツールボックスであることを望みます ; 現在の API で何らかの制限を感じたり、追加のモデル、スケジューラやテクニックを見たい場合には、何を見たいかに言及して GitHub issue をオープンしてください。
Credits
(訳注: 原文 参照)
以上