PyTorch 1.0 Tutorials : 画像 : ONNX を使用して PyTorch から Caffe2 とモバイルにモデルを移す (翻訳/解説)
翻訳 : (株)クラスキャット セールスインフォメーション
作成日時 : 12/14/2018 (1.0.0.dev20181212)
* 本ページは、PyTorch 1.0 Tutorials : Image : TRANSFERING A MODEL FROM PYTORCH TO CAFFE2 AND MOBILE USING ONNX を翻訳した上で適宜、補足説明したものです:
* サンプルコードの動作確認はしておりますが、必要な場合には適宜、追加改変しています。
* ご自由にリンクを張って頂いてかまいませんが、sales-info@classcat.com までご一報いただけると嬉しいです。
画像 : ONNX を使用して PyTorch から Caffe2 とモバイルにモデルを移す
このチュートリアルでは、PyTorch で定義されたモデルを ONNX フォーマットに変換するためにどのように ONNX を使用するかそしてそれを Caffe2 にどのようにロードするかについて説明します。ひとたび Caffe2 内では、それが正しくエクスポートされたかダブルチェックするためにモデルを実行することができてそしてモバイル・デバイス上でモデルを実行するために mobile exporter のような Caffe2 特徴をどのように使用するかを示します。
このチュートリアルのためには、onnx, onnx-caffe2 と Caffe2 をインストールする必要があります。onnx のバイナリ・ビルドを pip install onnx で取得することができます。
NOTE: このチュートリアルは PyTorch マスター・ブランチが必要です、それは ここ の手順をフォローしてインストールできます。
# Some standard imports
import io
import numpy as np

from torch import nn
import torch.utils.model_zoo as model_zoo
import torch.onnx
超解像 (= super-resolution) は画像、動画の解像度を増す方法で画像処理や動画編集で広く使用されます。このチュートリアルのために、最初にダミー入力を持つ小さい超解像モデルを使用します。
最初に、PyTorch で SuperResolution モデルを作成しましょう。このモデル は PyTorch の examples から変更なしに直接的に由来しています。
# Super Resolution model definition in PyTorch
import torch.nn as nn
import torch.nn.init as init


class SuperResolutionNet(nn.Module):
    def __init__(self, upscale_factor, inplace=False):
        super(SuperResolutionNet, self).__init__()

        self.relu = nn.ReLU(inplace=inplace)
        self.conv1 = nn.Conv2d(1, 64, (5, 5), (1, 1), (2, 2))
        self.conv2 = nn.Conv2d(64, 64, (3, 3), (1, 1), (1, 1))
        self.conv3 = nn.Conv2d(64, 32, (3, 3), (1, 1), (1, 1))
        self.conv4 = nn.Conv2d(32, upscale_factor ** 2, (3, 3), (1, 1), (1, 1))
        self.pixel_shuffle = nn.PixelShuffle(upscale_factor)

        self._initialize_weights()

    def forward(self, x):
        x = self.relu(self.conv1(x))
        x = self.relu(self.conv2(x))
        x = self.relu(self.conv3(x))
        x = self.pixel_shuffle(self.conv4(x))
        return x

    def _initialize_weights(self):
        init.orthogonal_(self.conv1.weight, init.calculate_gain('relu'))
        init.orthogonal_(self.conv2.weight, init.calculate_gain('relu'))
        init.orthogonal_(self.conv3.weight, init.calculate_gain('relu'))
        init.orthogonal_(self.conv4.weight)

# Create the super-resolution model by using the above model definition.
torch_model = SuperResolutionNet(upscale_factor=3)
通常は、このモデルを今訓練するでしょう ; けれども、このチュートリアルのためには、代わりにある事前訓練された重みをダウンロードします。このモデルは良い精度のために完全には訓練されていません、そしてここではデモ目的のみのために使用されることに注意してください。
# Load pretrained model weights
model_url = 'https://s3.amazonaws.com/pytorch/test_data/export/superres_epoch100-44c6958e.pth'
batch_size = 1    # just a random number

# Initialize model with the pretrained weights
map_location = lambda storage, loc: storage
if torch.cuda.is_available():
    map_location = None
torch_model.load_state_dict(model_zoo.load_url(model_url, map_location=map_location))

# set the train mode to false since we will only run the forward pass.
torch_model.train(False)
PyTorch におけるモデルのエクスポートは tracing を通して動作します。モデルをエクスポートするためには、torch.onnx._export() 関数を呼び出します。これはモデルを実行し、出力を計算するためにどのような演算子が使用されるかの trace を記録します。_export はモデルを実行しますので、入力 tensor x を提供する必要があります。この tensor の値は重要ではありません ; それは正しいサイズであれば画像でもランダム tensor でもかまいません。
PyTorch の export インターフェイスについての更なる詳細を学習するには、torch.onnx ドキュメント を確かめてください。
# Input to the model
x = torch.randn(batch_size, 1, 224, 224, requires_grad=True)

# Export the model
torch_out = torch.onnx._export(torch_model,             # model being run
                               x,                       # model input (or a tuple for multiple inputs)
                               "super_resolution.onnx", # where to save the model (can be a file or file-like object)
                               export_params=True)      # store the trained parameter weights inside the model file
torch_out はモデルを実行した後の出力です。通常はこの出力を無視できますが、ここではエクスポートしたモデルが Caffe2 で実行されたときに同じ値を計算するかを検証するためにそれを使用します。
さて ONNX 表現を取りそしてそれを Caffe2 で使用しましょう。この部分は通常は別個のプロセスかもう一つのマシン上で成されますが、Caffe2 と PyTorch がネットワークのために同じ値を計算していることを検証できるように同じプロセスで続行します :
import onnx
import caffe2.python.onnx.backend as onnx_caffe2_backend

# Load the ONNX ModelProto object. model is a standard Python protobuf object
model = onnx.load("super_resolution.onnx")

# prepare the caffe2 backend for executing the model this converts the ONNX model into a
# Caffe2 NetDef that can execute it. Other ONNX backends, like one for CNTK will be
# availiable soon.
prepared_backend = onnx_caffe2_backend.prepare(model)

# run the model in Caffe2

# Construct a map from input names to Tensor data.
# The graph of the model itself contains inputs for all weight parameters, after the input image.
# Since the weights are already embedded, we just need to pass the input image.
# Set the first input.
W = {model.graph.input[0].name: x.data.numpy()}

# Run the Caffe2 net:
c2_out = prepared_backend.run(W)[0]

# Verify the numerical correctness upto 3 decimal places
np.testing.assert_almost_equal(torch_out.data.cpu().numpy(), c2_out, decimal=3)

print("Exported model has been executed on Caffe2 backend, and the result looks good!")
PyTorch と Caffe2 の出力が数値的に小数点以下 3 桁まで一致して実行されることを見るはずです。ついでに言うと、それらが一致しないのであれば Caffe2 と PyTorch の演算子が異なって実装されているという問題がありますのでその場合には私達にコンタクトしてください。
ONNX を使用して SRResNet を移行する
上と同じプロセスを使用して、このペーパー で提案されている超解像のための興味深い新しいモデル “SRResNet” もまた移行しました (このチュートリアルのためのコードと事前訓練されたパラメータの私達への提供について Twitter の著者に感謝します)。モデル定義と事前訓練されたモデルは ここで 見つかります。下は SRResNet モデルの入力、出力がどのように見えるかです。

モバイルデバイス上でモデルを実行する
ここまで PyTorch からモデルをエクスポートしてそれを Caffe2 でロードして実行するかを示してきました。モデルが Caffe2 にロードされた今、それを モバイルデバイス上で実行する ために適切なフォーマットに変換できます。
モバイル上で動作できる 2 つのモデル protobuf を生成する Caffe2 の mobile_exporter (訳注: リンク切れ) を使用します。最初のものは正しい重みを持つネットワークを初期化するために使用され、そして 2 番目が実際にモデルを実行するために動作します。このチュートリアルの残りのために小さい超解像モデルを引続き使用します。
# extract the workspace and the model proto from the internal representation
c2_workspace = prepared_backend.workspace
c2_model = prepared_backend.predict_net

# Now import the caffe2 mobile exporter
from caffe2.python.predictor import mobile_exporter

# call the Export to get the predict_net, init_net. These nets are needed for running things on mobile
init_net, predict_net = mobile_exporter.Export(c2_workspace, c2_model, c2_model.external_input)

# Let's also save the init_net and predict_net to a file that we will later use for running them on mobile
with open('init_net.pb', "wb") as fopen:
    fopen.write(init_net.SerializeToString())
with open('predict_net.pb', "wb") as fopen:
    fopen.write(predict_net.SerializeToString())
init_net はモデル・パラメータとそれに埋め込まれたモデル入力を持ち、そして predict_net は init_net の実行を実行時にガイドするために使用されます。このチュートリアルでは、上で生成された init_net と predict_net を使用してそれらを通常の Caffe2 バックエンドとモバイルの両者で実行して、そして両者の実行で生成された出力超解像猫画像が同じであることを検証します。
このチュートリアルのために、下のように見える広く使われている有名な猫画像を使用します。
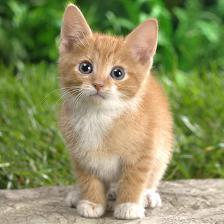
# Some standard imports
from caffe2.proto import caffe2_pb2
from caffe2.python import core, net_drawer, net_printer, visualize, workspace, utils

import numpy as np
import os
import subprocess
from PIL import Image
from matplotlib import pyplot
from skimage import io, transform
最初に、画像をロードして、標準的な skimage python ライブラリを使用してそれを前処理しましょう。この前処理はニューラルネットワークを訓練/テストするためのデータ処理の標準的な実践です。
# load the image
img_in = io.imread("./_static/img/cat.jpg")
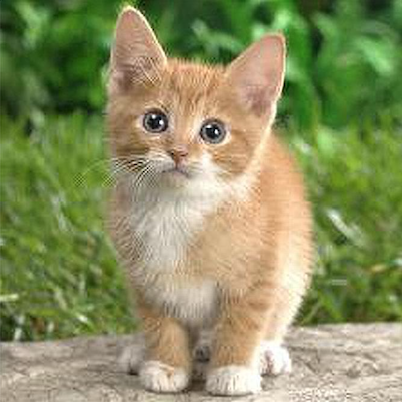
# resize the image to dimensions 224x224
img = transform.resize(img_in, [224, 224])
# save this resized image to be used as input to the model
io.imsave("./_static/img/cat_224x224.jpg", img)
さて、次のステップとして、リサイズされた猫画像を取って超解像モデルを Caff2 バックエンドで実行して出力画像をセーブしましょう。下の画像処理ステップは ここ の超解像モデルの PyTorch 実装から採用されています。
# load the resized image and convert it to Ybr format
img = Image.open("./_static/img/cat_224x224.jpg")
img_ycbcr = img.convert('YCbCr')
img_y, img_cb, img_cr = img_ycbcr.split()

# Let's run the mobile nets that we generated above so that caffe2 workspace is properly initialized
workspace.RunNetOnce(init_net)
workspace.RunNetOnce(predict_net)

# Caffe2 has a nice net_printer to be able to inspect what the net looks like and identify
# what our input and output blob names are.
print(net_printer.to_string(predict_net))
上の出力から、入力は “9” と名前付けられて出力は “27” と名前付けられていることを見て取れます (blob 名として数字を持つことは少し奇妙ですが、これは tracing JIT がモデルのために番号がふられたエントリを生成するからです)。
# Now, let's also pass in the resized cat image for processing by the model.
workspace.FeedBlob("9", np.array(img_y)[np.newaxis, np.newaxis, :, :].astype(np.float32))

# run the predict_net to get the model output
workspace.RunNetOnce(predict_net)

# Now let's get the model output blob
img_out = workspace.FetchBlob("27")
さて、最後の出力画像を構築し戻して画像をセーブするために ここ の超解像モデルの PyTorch 実装内の後処理ステップに戻って参照します。
img_out_y = Image.fromarray(np.uint8((img_out[0, 0]).clip(0, 255)), mode='L')

# get the output image follow post-processing step from PyTorch implementation
final_img = Image.merge(
    "YCbCr", [
        img_out_y,
        img_cb.resize(img_out_y.size, Image.BICUBIC),
        img_cr.resize(img_out_y.size, Image.BICUBIC),
    ]).convert("RGB")

# Save the image, we will compare this with the output image from mobile device
final_img.save("./_static/img/cat_superres.jpg")
純粋な Caffe2 バックエンドでモバイルネットの実行を終了しましたので今、モデルを Android デバイス上で実行してモデル出力を取得しましょう。
NOTE: Android 開発のためには、adb シェルが必要です、さもなければチュートリアルの以下のセクションは動作しません。
モバイル上でモデルを実行する最初のステップは、モバイルデバイスのための native 速度ベンチマーク・バイナリを adb にプッシュします。このバイナリはモバイル上のモデルを実行してまた後で取得可能なモデル出力もエクスポートします。バイナリは ここ で利用可能です。バイナリをビルドするためには、ここ の手順を追って build_android.sh スクリプトを実行してください。
NOTE: ANDROID_NDK をインストールして ndk root へ env 変数 ANDROID_NDK=path を設定する必要があります。
# let's first push a bunch of stuff to adb, specify the path for the binary
CAFFE2_MOBILE_BINARY = ('caffe2/binaries/speed_benchmark')

# we had saved our init_net and proto_net in steps above, we use them now.
# Push the binary and the model protos
os.system('adb push ' + CAFFE2_MOBILE_BINARY + ' /data/local/tmp/')
os.system('adb push init_net.pb /data/local/tmp')
os.system('adb push predict_net.pb /data/local/tmp')

# Let's serialize the input image blob to a blob proto and then send it to mobile for execution.
with open("input.blobproto", "wb") as fid:
    fid.write(workspace.SerializeBlob("9"))

# push the input image blob to adb
os.system('adb push input.blobproto /data/local/tmp/')

# Now we run the net on mobile, look at the speed_benchmark --help for what various options mean
os.system(
    'adb shell /data/local/tmp/speed_benchmark '                     # binary to execute
    '--init_net=/data/local/tmp/super_resolution_mobile_init.pb '    # mobile init_net
    '--net=/data/local/tmp/super_resolution_mobile_predict.pb '      # mobile predict_net
    '--input=9 '                                                     # name of our input image blob
    '--input_file=/data/local/tmp/input.blobproto '                  # serialized input image
    '--output_folder=/data/local/tmp '                               # destination folder for saving mobile output
    '--output=27,9 '                                                 # output blobs we are interested in
    '--iter=1 '                                                      # number of net iterations to execute
    '--caffe2_log_level=0 '
)

# get the model output from adb and save to a file
os.system('adb pull /data/local/tmp/27 ./output.blobproto')


# We can recover the output content and post-process the model using same steps as we followed earlier
blob_proto = caffe2_pb2.BlobProto()
blob_proto.ParseFromString(open('./output.blobproto').read())
img_out = utils.Caffe2TensorToNumpyArray(blob_proto.tensor)
img_out_y = Image.fromarray(np.uint8((img_out[0,0]).clip(0, 255)), mode='L')
final_img = Image.merge(
    "YCbCr", [
        img_out_y,
        img_cb.resize(img_out_y.size, Image.BICUBIC),
        img_cr.resize(img_out_y.size, Image.BICUBIC),
    ]).convert("RGB")
final_img.save("./_static/img/cat_superres_mobile.jpg")
今、画像 cat_superres.jpg (純粋な caffe2 バックエンド実行からのモデル出力) と画像 cat_superres_mobile.jpg (モバイル実行からのモデル出力) を比較することができて両者の画像が同じに見えることが確認できます。もしそれらが同じに見えない場合は、モバイル上の実行で何かが上手くいっていません、そしてその場合、Caffe2 コミュニティにコンタクトしてください。次のように見える出力画像を見ることが期待できるはずです :
上のステップを使用して、貴方のモデルをモバイル上で簡単に配備することができます。また、caffe2 モバイル・バックエンドの更なる情報については caffe2-android-demo を確かめてください。
以上